Sunday 13 September 2015

Happy Hundred Day!

Not that it's been 100 days since I started this adventure (118 if you count from Planting day on May Long Weekend), but today I finally made my unspoken goal. I present to the world, jars 99 and 100, of preserved food awesomeness.

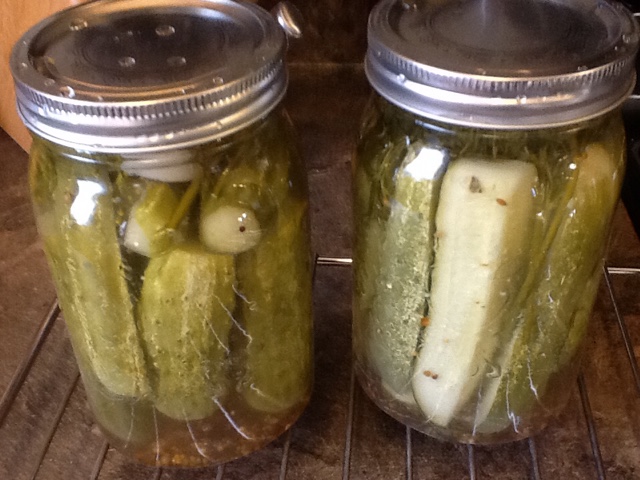
A repeat of the Zucchini Salsa that I made last year, that was gone before I knew it. 


A slightly different consistency than last year, as we've made the switch to organic everything, so everything down to the sugar is different. However, it still has that delicious flavour, balanced between the sweetness of the tomatoes, the tangy-ness of the vinegar, the heat from the jalapeños, and smokiness of the cumin. Now that I think of it, I could have added in one of my smoked chipotle peppers...

---

I don't know what it was this year that made me feel like I needed to learn these almost-lost skills of food preservation. Perhaps there is an impending zombie apocalypse that I don't know about yet (in which case you will want to come to my house). Perhaps there is a part of me that wanted to reconnect with my childhood memories of watching mom make jam. (Oddly enough, I only made three jars of jam this season.) Perhaps it was the switching to organic, homegrown, or natural foods, and knowing where what you are eating comes from, that was the biggest contributor. 

There is an immense amount of satisfaction that I experienced every time I heard that magical "pop" that tells you a jar just sealed. Or looking at the pantry and seeing it lined with jars of foodstuffs that will (hopefully) see us through the winter. Or smelling the smoke from the smoker, and anticipating the mouth-watering bacon or ham or jerky or sausage that will come from it. Looking back, I think that this was a good choice for me to make, the philosophical shift from "I want..." (And purchasing) to "I can... " (and making). With my previous culinary experience, and willingness to try, I'm certain that I can create anything I put my mind to. 

Wednesday 19 August 2015

Pickles every four days...

I would say that this is a "first world problem" being forced to make pickles every four days, but really, it's rather an "old world problem", as this was what it was like in the good old days. With only three cucumber plants, I am still getting enough cucumbers every four or five days to make a quart jar or more of pickles. *sigh* Life's rough.

In searching for more variety of pickled goodness (mustard pickles, dill pickles, sriracha chard pickles...) my lovely wife found a recipe for jalapeño basil garlic dill pickles... Why not? I just happen to have a planter full of basil as well.


Into each quart jar:

2 garlic cloves
2 heads dill
1 tbsp pickling spice
1 dried chilli
Handful of sliced jalapeño peppers
Packed full of cucumbers
Handful of basil

Standard pickle solution:
3 cups pickling vinegar
3 cups water
6 tbsp pickling salt

Wate bath processed for 15 minutes. Done, and done.


A peck of pickled peppers...

Visit to the Italian Centre Shoppe in Edmonton results in Pepper Fiasco!

They were on sale for $1.49/lb, from BC. I held back and only bought only 6 pounds: hot, sweet, and mild peppers. From that, I ended up with 10 pints of pickled peppers, 3 in each variety plus an extra hot jar, plus two quart jars of mixed peppers. Not bad for a day's work!

Plus, I made a small jar of jalapeños, leftover from the Jalapeño basil garlic dill pickles I made at the same time...


Into each jar:

1 garlic clove (2 for a quart)
1 tsp pickling spice (2 for a quart)
Peppers to the top.

Standard pickling solution:
2 cups pickling vinegar
2 cups water
2 tbsp salt

For hot and mild peppers: add 1 tsp turmeric to solution
For sweet peppers: add 1 tbsp sugar to solution

Fill jars with boiling pickling solution, remove air bubbles with a spatula, wipe rims and lids finger tight.
15-20 min in a boiling water bath, and wait for the pops!


Tuesday 18 August 2015

Anaphylaxis Adventure!

Don't visit our house today if you're allergic to peanuts. Seriously.

Some friends gave us some of their 60lb bag of organic, raw peanuts. (Of course I planted them!) today was our experiment in making fresh roasted peanuts, and of course from there it is a short leap to home made peanut butter.

Ever had raw peanuts? Perhaps not so oddly enough, they have a slowly nutty, slightly pea-ish flavour to them. To get them to that lovely, rich, peanutty-flavour that we all love so much, they need to be roasted first. 

Using a recipe from thekitchn.com, we roasted our nuts in a single layer on a cookie sheet, 350 for 20-25 min. I actually lowered the temperature to 325 after 15 minutes, as it smelled a little like the skins were burning. A little salt on the nuts when they came out of the oven, and then the hard part: waiting for them to cool enough to eat. You could hear them crackling happily to themselves as they cooled, the nut pulling away from the skins slightly.


Delicious! Still warm, slightly salty, and rich and buttery all at once. 

Next up? Peanut butter of course! I kept half of the nuts for eating, and skinned the other half, with some help of course :) Peanut skins flying everywhere! An anaphylactic's worst nightmare, I'm certain.
It's deceivingly simple to make fresh, home made peanut butter. Nuts? Meet blender. 


After about three minutes of blending, it started to show signs of smooth oily goodness around the bottom edges. 


Little lumps were still going around inside, but I checked it out anyway. It wasn't quite as smooth as store bought peanut butter, but had a slightly whipped consistency that looked promising. Thekitchn said to give it a few more minutes at this point, so I did, and voila:


... a magical transformation occurred, and it all came together in a uniform, smooth, creamy consistency. A quick taste, and sure enough, peanut butter! I added a dash of salt and a swirl of honey for a little character and depth of flavour, and another quick blend. 


I ended up with a small jar full, and enough leftover for lunch. Peanut butter sandwiches: fresh homemade organic bread, organic blackberry jam from BC, and some apples from the Organic Box. 
#happysquirrel


Thursday 6 August 2015

Pickle Thursday

My first pick of cucumbers is finally ready, enough to make a couple jars of dill pickles. Really I should have picked them a couple days ago as a few of them ar really big, but I'll just slice them this time. I love pickles, mostly because they are so easy to make, and super delicious. I like mine with extra garlic and dill. The fresher you can get the ingredients, the better they will be!


I had enough to do two quart jars, one sliced and one whole cucumbers. Here's the recipe with enough liquid to do 3 quart jars:

4 lbs cucumbers, washed. Slice them into quarters if they're large, or leave them whole if they're smaller. It's best to pack each jar with the same "kind" - either whole or sliced.

4 cups vinegar
4 cups water
3/4 cup sugar
1/2 cup pickling salt

For each jar:
1-2 heads of dill
1 clove garlic
1 bay leaf
1 tbsp pickling spice
1/4 tsp mustard seed

Sterilize the jars. Keep them hot.
Bring the vinegar, water, sugar, & salt to a boil. 
Put the dill, garlic, and spices into each hot jar, and pack each jar full of cucumbers, leaving room at the top.
Fill with boiling liquid, leaving 1/2" head space.
Centre the lids and add rings, finger tight.
Process in boiling wate bath for 15 min.
Leave them sit undisturbed for 24 hrs. Listen for the "pop!" that lets you know they sealed. Always a satisfying sound!


Saturday 1 August 2015

Adventures of a Squirrel: Tomato Soup

Another 30lbs of tomatoes, what to do? How about some home made, organic tomato soup, of course! I used the recipe from http://www.pickyourown.org/tomatosoup.htm but there are a few on the Internet that sounded good. One caution however, I wouldn't add flour as a thickener, as it would throw off your acid balance and could cause problems in the longevity of your preserved food. 

So, here we go. Once again, it's important to start with clean equipment, and sterilize jars properly. I used the sterilize feature on my dishwasher for the jars and rings, and boiled the lids ahead of time. 

It seemed to take an awfully long time to bring 30lbs of tomatoes to a boil. About two hours, on med-high heat. I actually had to switch to a larger pot and move to the propane burner outside because there were so many tomatoes! Once everything was in the pot and happily bubbling away, I let it simmer for an extra half hour to help the flavours come together, and thicken the soup a little more. My immersion blender took care of the skins and most of the seeds, but there were still a few left in the pot when I was done. Extra fibre, I guess.

I could only process 7 quarts at a time, but in the end it will be worth it. 13 jars altogether, with 4 good size servings per jar. I'm appreciating my pressure canner a little more every day. :)


The Recipe:

30lbs ripe tomatoes, cored and quartered.
6lbs onions, chopped
1 head of garlic, minced
2 cups sugar 
3tbsp salt
1 cup chopped fresh basil
Lemon juice, 2tbsp per quart jar

1. Working with about a bowlful at a time, add tomatoes to a huge pot with a little water to keep them from sticking. Bring to a boil.

2. As the tomatoes boil, continue adding tomatoes a bowl at a time. Stir often, pushing down the floaters into the boiling liquid, until all the tomatoes are added.

3. Add the onion and garlic, and continue boiling until the onions are soft, about 30 min.

4. Remove from heat. Working a small amount at a time, use an immersion blender or food mill to make your soup all smooth. If you don't want the seeds you will need to strain them out with a coarse strainer. If you use a fine mesh strainer, not only will you end up removing a lot of the pulp, but it will take you FOREVER and a day. I was lazy and left mine in.

5. Put your monster pot back on the heat, and bring it back to a boil. Add the sugar, salt, and basil, to taste. I added the whole 2 cups, and I think it will be a little sweet in the end. The sugar is meant to accentuate the sweetness of the tomatoes, not overpower them, and to offset the acid that gets added to each jar.

6. Add 2tbsp lemon juice to each jar. This is an important step as it ensures that the food is acidic enough to be preserved for longer than a few days. Once the lemon juice is in, ladle in the soup, leaving 1/2" of head space.

7. Put on the lids, and rings, finger tight. Process in a pressure canner, 20 minutes @11-13 lbs pressure for a dial-gauge style canner. Tomatoes are a low-acid food, right on the verge of what would be safe for a boiling water bath process, so it's better to be safe than sorry. No botulism for me, please. (Although, perhaps I could harvest the spores somehow and sell my toxin for injection purposes?)


Tuesday 28 July 2015

Salsa Tuesday!

So we were in Victoria visiting family, and paid a visit to the Root Cellar, a local grocer that sources as much as they can from local and organic growers. Huge props to Phil, who it turns out is one of the owners, because he took me into the back and let me have my pick of the cases of tomatoes he had available. Not that they were on the shelf for sale as a case, those were $2.99/lb. I got a sweet deal: $50 for 30lbs of organic Roma's or Field's for $30. (I got both of course.)
The first box is dedicated to Salsa, since it is the most ripe and probably wouldn't survive the trip home. So here you go, Nikki, my recipe:

Equipment:
The biggest pot you have
The biggest spoon you have
A super sharp knife and cutting board
Various bowls
About 1/2 day if you are a ninja, most of a day if not
12 x 1L wide mouth mason jars, with lids & rings

Ingredients: (I had to make two batches since the pot wasn't big enough...)
30lbs tomatoes
6lbs onions
3lbs bell peppers
4 heads garlic
1.5 lbs jalapeño peppers
1 bunch cilantro
1 lb limes (the juice of)*
1/2 cup lemon juice*
3 tbsp salt
1.5 cups sugar (optional)

*important: you need to add an acid in order to preserve it safely and properly; tomatoes are right on th verge of being considered a "low acid" food. You could also use cider vinegar instead of the lemon and lime juices.

1. Wash all your jars, lids, and rings. Sterilize them in a clean dishwasher, or boiling water. Set them aside. Wash all your other cooking utensils and rinse well. This step is important to prevent spoilage and unwanted bacteria in your canned foods!

2. Wash and chop tomatoes, discarding any bruised or damaged spots, and the core if you want. If they are really watery, feel free to remove the seeds. It will also save you a little time in step 5. Chop them as small or as coarse as you want your finished salsa to be. I hand chopped mine, and was able to do 10lbs every half hr. Do not mistake the pink-red colour of the tomatoes with your fingers, as you probably don't want blood in your salsa.
Put the tomatoes (not your fingers) in the pot with a little olive oil to prevent sticking. Get them starting to simmer.

3. Chop the onions and peppers and add them to the pot.

4. Use gloves to remove the tops and seed the jalapeños, and mince them together with the garlic in a food processor. Do not touch your eyes. Trust me. Toss these in the pot and then go wash your hands.

5. Simmer, stir, simmer some more, until your salsa starts to thicken. The longer you let it simmer for, the less water in your salsa, and the less runny it will be.

6. Near the end, add the minced garlic and jalapeños, the lemon and lime juices, chopped cilantro, salt, and sugar if you're using it. Stir well. Let it simmer for an extra few minutes, then remove from heat.

7. Use a ladle and a canning funnel to get the hot salsa into the sterilized jars. Use a rubber spatula or plastic spoon to remove air bubbles from the inside of the jar. Wipe the rims of the jars to ensure a good seal, add lids and rings. Turn to finger tight only.

8. Process the closed jars in a hot water bath for 20 minutes. Remove the jars and set them on a wire rack. 

9. Wait for the "pop!" that lets you know the jars are sealed!

There you, good luck!